When it comes to graphic design, efficiency, and speed are as critical as creativity and precision. Adobe Photoshop remains the cornerstone tool for designers, photographers, and artists worldwide, providing an expansive canvas where imagination takes shape. However, amidst the vast array of tools and features lies the true power of Photoshop – shortcuts. These keystroke combinations are the secret passages through the labyrinth of creative processes, allowing for a swifter transition from vision to visual.
In this article, we delve deep into the most essential Photoshop shortcuts that every designer should have up their sleeve – the tricks of the trade that differentiate the novices from the maestros.
Hide Selections And Guides
In the realm of Photoshop, selections are the cornerstone of precise editing. Whether you’re isolating a subject, adjusting color, or compositing images, selections enable you to work with incredible accuracy. But there comes a time when those marching ants that delineate your selection become a visual hindrance. Enter the ‘Hide Selections’ shortcut (Ctrl + H on Windows or Cmd + H on macOS), a simple yet powerful command that momentarily clears your canvas of selection boundaries, allowing you to view your work unobstructed.
Advantages of Hiding Selections:
- Uninterrupted View: Allows for a clear view of edits without the distraction of selection outlines;
- Precision Editing: Edit within a selection without the visual interference, ensuring every detail is perfect;
- Presentation: Present your work in progress without the selection lines, offering a cleaner look.
Using ‘Hide Selections’ is akin to an artist stepping back to view their painting without the scaffolding that helped build it. It’s essential for designers to see their work in its natural state, if only for a moment, to ensure every edit is contributing to the visual harmony of the piece.
Undo More, Redo More
Mistakes are a natural part of the creative process, and Photoshop’s undo and redo commands are the proverbial time machines that allow us to navigate through our history of actions. The usual Ctrl + Z (or Cmd + Z on macOS) is well-known to many, but Photoshop extends this capability with Ctrl + Alt + Z (or Cmd + Option + Z on macOS) to step backwards multiple times, and Ctrl + Shift + Z (or Cmd + Shift + Z on macOS) to step forward. This trio of shortcuts allows for a dance back and forth in time, ensuring that no error is permanent and no experimental edit is too risky.
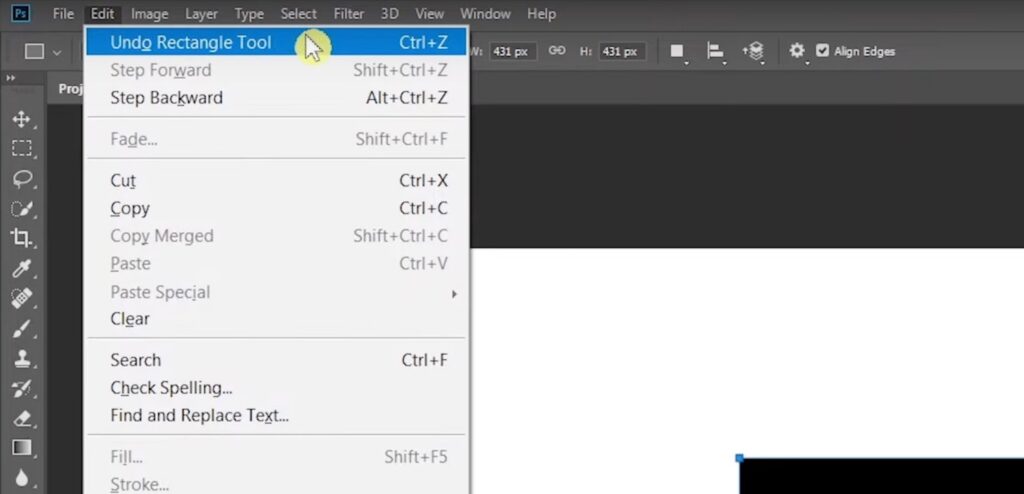
Undo and Redo Shortcuts in Action:
| Action | Shortcut (Windows) | Shortcut (macOS) |
|---|---|---|
| Undo | Ctrl + Z | Cmd + Z |
| Step Backwards | Ctrl + Alt + Z | Cmd + Option + Z |
| Step Forwards | Ctrl + Shift + Z | Cmd + Shift + Z |
Utilizing these shortcuts with agility can significantly speed up the editing workflow. A designer who masters these commands spends less time clicking through menus and more time bringing their creative vision to life. Like a composer who gracefully recovers from a misplaced note, a Photoshop artist can effortlessly reverse a step, or many, and continue their symphony of pixels without missing a beat.
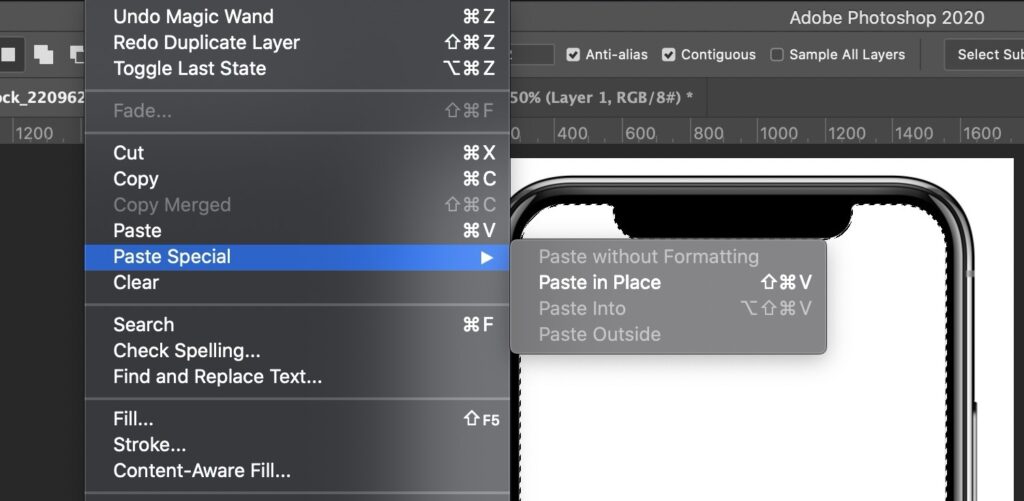
Paste In Place
Imagine meticulously cutting out a complex shape, only to have it misplaced by a pixel or a layer during the pasting process—every designer’s annoyance. However, with Photoshop’s ‘Paste in Place’ command (Ctrl + Shift + V on Windows, Cmd + Shift + V on macOS), you can ensure that whatever you cut or copied lands right back in the exact pixel position on a new layer or even in another document. This is especially beneficial when working with multiple elements that need to align perfectly across various compositions.
Scenarios Where ‘Paste in Place’ Elevates Your Design:
- Multi-layer Compositions: Keep elements aligned across different layers;
- Design Consistency: Maintain the position of logos or icons when transferring between documents;
- Animation Frames: Align elements across frames for seamless animations.
The ‘Paste in Place’ function acts like an anchor, securing your elements precisely where you want them, maintaining the integrity of your spatial design, and allowing you to work with the confidence that comes from control.
Brush Shortcuts
With a digital brush in hand, a designer paints the virtual canvas, crafting everything from subtle textures to bold strokes. But the artistry of using brushes in Photoshop goes beyond mere application—it’s in the fluidity and responsiveness of the brush to the artist’s intent. Brush shortcuts provide this by offering quick adjustments to size and hardness without breaking the creative flow.
Quick Brush Adjustment Shortcuts:
- Size Up/Down: [ or ] – Decrease or increase brush size;
- Hardness Up/Down: { or } – Decrease or increase brush hardness;
- Brush Preset Toggle: Shift + [ or Shift + ] – Navigate through brush presets.
Effectiveness of Brush Shortcuts:
Brush shortcuts not only save time but also allow for a more intuitive and expressive creation process. Instead of manually adjusting settings through panels, a designer can dynamically alter the brush’s behavior as they work, much like a traditional artist would naturally apply different pressures or angles to a real brush.
Layers
Layers are the building blocks of Photoshop compositions. They allow for non-destructive editing and provide a flexible way to organize different elements of your design. To navigate through layers efficiently, familiarize yourself with these layer shortcuts, which can save you an immense amount of time:
- Quick Layer Selection: Alt + [ or ] (Windows) / Option + [ or ] (macOS) to cycle through layers;
- Select Multiple Layers: Shift + Click to select contiguous layers, Ctrl + Click (Windows) / Cmd + Click (macOS) for non-contiguous layers;
- Merge Layers: Ctrl + E (Windows) / Cmd + E (macOS) for merging selected layers.
Employing these shortcuts allows you to manipulate layers with the same dexterity as a maestro commanding an orchestra—each layer, an instrument; each shortcut, a stroke of the conductor’s baton.
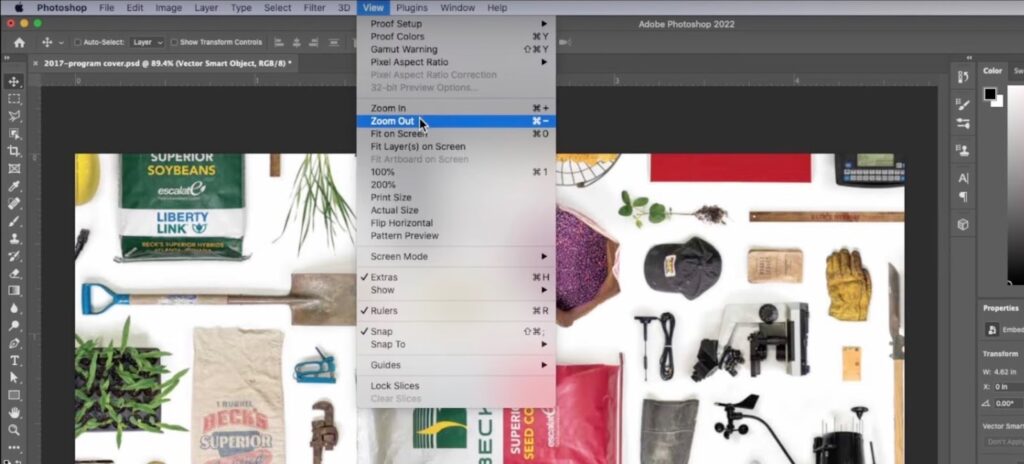
Zooming In and Out
Delving into the details of a design often requires a closer examination. The ability to zoom in and out fluidly in Photoshop is essential for this purpose. While the magnifying glass tool is one way to do this, there are shortcuts that can expedite the process:
- Zoom In: Ctrl + Plus (Windows) / Cmd + Plus (macOS);
- Zoom Out: Ctrl + Minus (Windows) / Cmd + Minus (macOS);
- Fit on Screen: Ctrl + 0 (Windows) / Cmd + 0 (macOS).
A comparison table could be included here to show different zoom levels and their impact on detailing work, providing a visual guide for readers to understand the importance of zooming in design.
Reselect
In the flow of editing, you might find the need to reselect a previously selected area. Instead of retracing your steps, Photoshop’s ‘Reselect’ command (Ctrl + Shift + D on Windows, Cmd + Shift + D on macOS) allows you to reclaim your last deselected area instantly. This feature is particularly useful when working with complex selections that took time to create. It saves you from the tedious task of reselecting manually and keeps your workflow smooth and uninterrupted.
Photoshop Shortcuts for Text
Text manipulation in Photoshop can be cumbersome without the right shortcuts. Whether adjusting the font size or the leading, knowing these keystrokes will make text editing as agile as your creativity:
- Increase/Decrease Font Size: Ctrl + Shift + > or < (Windows) / Cmd + Shift + > or < (macOS);
- Adjust Leading: Alt + Up/Down Arrow (Windows) / Option + Up/Down Arrow (macOS)
Here, a list can be used to highlight the most common text editing shortcuts, aiding the reader in memorizing these critical commands.
Jquery Notification Popup: A Designer’s Shortcut to Interactive Feedback
In the digital design landscape, engaging user interaction is the hallmark of a great user experience. jQuery notification popups serve as a bridge between the user actions and the interface, providing immediate feedback that is both informative and visually integrated. For designers, understanding how to implement these popups can be as crucial as mastering Photoshop shortcuts. They are the interactive counterparts to static visual elements, bringing life to the user’s journey through timely alerts and messages.
Implementing jQuery Notification Popups:
- Initialization: Include the jQuery library along with the notification plugin in your project;
- Customization: Tailor the look and behavior of the popup to fit the design and user experience of your website;
- Triggering Events: Attach the popup to specific events or user actions, such as form submissions or button clicks.
Advantages of Using jQuery Popups in Design:
- User Engagement: They capture user attention and provide immediate feedback;
- Design Consistency: Customizable to match the style and palette of the website or application;
- Efficiency: Quick to implement with simple code snippets, much like using keyboard shortcuts in Photoshop.
Here’s a basic example table of options you might configure for a jQuery notification popup:
| Option | Description | Example Values |
|---|---|---|
| autoOpen | Whether the popup opens automatically. | true, false |
| duration | Time before the popup closes. | 3000 (milliseconds) |
| position | The placement of the popup on screen. | ‘top-right’, ‘center’ |
| type | Type of notification. | ‘info’, ‘success’, ‘error’ |
For designers adept at Photoshop, integrating jQuery notification popups into their web designs is a powerful way to create a responsive and interactive experience. Just as Photoshop shortcuts streamline the design process, jQuery popups streamline user interaction, making them an essential tool in the web designer’s arsenal.
Conclusion
Embracing Photoshop shortcuts is akin to a musician mastering their instrument—vital for turning creative impulses into art with fluidity and grace. As we’ve journeyed through the essential shortcuts, the underlying message is clear: efficiency breeds creativity. By weaving these keystrokes into the fabric of your design workflow, you not only save time but also elevate your craft. Let these shortcuts become second nature, and watch as your productivity and creativity soar. Remember, the true artistry lies not just in the outcome, but in the process of creation itself.